Sunday, 10 November 2013

Have you ever moved a "Fairy"?

I think "The Fairy" rose is such a stunning rose for any garden.  It is so easy to grow, so forgiving and so gorgeous.  It blooms from early June to late in the fall.  Here it is in late October and still in bloom...


So, imagine having to move this spreading bush, that in spite of its massive blooms, has even more thorns.  Mine was about 6 feet wide and almost 4 feet tall. I think it is not impressed by being moved.
This is the third time I have moved this rose - from house to house and finally it would now be in its permanent spot.


We came up with the idea that wrapping it might work, and it did.  Here is How We did it...

I took a large roll of clinging plastic wrap that movers use to wrap furniture.  Starting at the bottom, I wrapped the bush rather tightly, pulling in all the spreading branches, but also being careful not to break them.


Here it is below- wrapped, which made it so much easier to dig up.  Notice there are not many spreading roots…. This is because I transplanted it only the  previous  Fall and it had only one summer to grow in rather poor soil. As a tenant, I was not prepared to replace all the soil  in this borrowed garden, but I did add compost and fertilizer.


Because it had to be transported in the backseat of my car, I wrapped the roots in plastic.


Here it is with the roots wrapped in plastic.


And.....

All safely tucked into the car for the long drive to the new garden.  I say this with tongue-in-cheek as the ‘new’ house was literally around the corner from this one.

We love this neighbourhood so didn't want to move far!


Here it is planted in its new - and last - home.  The previous Fall, when we moved it from the last garden a medium sized piece broke off from this one so it too, got planted.  At least, no flowers or leaves fell off in the process.


Below you can see the largest piece on the right, and the smaller piece that broke off, to the left of the Japanese Maple.  There are Iris, Lungwort, Monk's Hood, Phlox and a Pee Gee Standard Hydrangea in the corner.


Friday, 1 November 2013

The Mysterious Peony


THE MYSTERIOUS PEONY:


That same week, I moved more plants.

Among those still in pots, was a ‘sort of Peony’ - I say, sort of, because when I bought it on our Master Gardener’s trip to Montreal (at a nursery in the middle of nowhere) I saw only the tag and I fell in love with the colour. It was less than $30.00.
I am not sure why, but I neglected to write down the type or name. Then, when it came time to plant it in its new home, there stuffed down under the earth, was the tag.

                                             This is what it looks like. Isn't it glorious?


It is an Itoh, or Intersectional Peony.  Its name is ‘Cora Louise’ and  has the best traits of both the herbaceous peony and the sturdy stems of the tree peony.   Until lately, its price was in the thousands of dollars but in the last few years, most gardeners who love peonies,  were able to find one for around $100.  My, was I lucky !

This peony is listed on many sites as ‘rare’.  Its gorgeous blooms are stunning and once it is established, it will bloom for longer than a traditional peony.
             
          You can find out more if you search on the net for Itoh peonies.


Here it is in early bloom -nestled behind the Fairy rose (in bud in front) and the Japanese Maple


I like to have other  flowering plants among the roses for several reasons.  One is that some roses get leggy and reach for the sky, showing off at the top of the branches and leaving the lower ones rather naked.  This Peony has gorgeous foliage that stays crisp and green until late fall and hides some of the taller roses behind it.


Time to get those roses on the road.


It had been raining off and on all day, and getting much cooler by the day-  Fall was definitely around the corner.

I must say I admit I was getting anxious about having to find the time to move all the plants I needed to.  The beds in the front were almost ready, but the back !! eei-eei-ooo....

In the meantime, the Crab Grass was having a 'hay'-day !  All that I dug out, had been gleefully replaced by more and more !  I needed more time and more shovel-wielding weeders. Of course, there were none to be found.  At least it was easy to pull as there had been some rain.

This does not look anything like a rose bed.


So, I decided to work at the front because there was more room and the bed was almost ready.

At a lecture at our Horticultural meeting, I asked if I should cut back my plants in order to move them, especially after hearing that each plant has its own cycle and should be cut back when it has taken in all the nutrients it can.  The speaker suggested I wait until the first hard frost when all the leaves would be gone.  

My concern was that the weather would be prohibitive, like the last time we  moved the garden where was up to this point - the same time of year.  Prohibitive, my foot - It was dark and cold with snowflakes and sleet and we were digging holes, throwing in bone meal, saying a little prayer and shoving roses in holes higglety-pigglety… and almost all of them survived and did well, and only one balked at the process. 

Sigh.  So I guess I can do it again.

For my planned rose-moving day, the weatherman promised high winds and pouring rain…. But… he lied.  It was cool and windy, but only spit now and then.  I decided to ‘make hay while the sun shines’ as they say and get on with it.  That turned into a whole day and here is what I moved.

13 roses- 
2 x Polyantha-‘Mothersday’
1 x David Austin’s “Evelyn” - pink Rosa AUS - English
2 x ‘Kristin’ var. Benmagic PPAF a miniature rose
1 x ‘White Lightening’ - var.Arowhif Pat. # 4670
3 x ‘Tournament of Roses’ - cv. Jacient Plant Pat. 6725
1 x ‘Eglantyne’ David Austin
1 x ‘Lambert Closse’ - Rosa explorer 
1 x ‘Astrid Lindgren’ - 
1 x mystery white that we think might be ‘Kathy Wade’
14 or 15 Monkshood (all new stems from one plant put in last fall !)
6 Delphiniums- blue and fuchsia
2 Penstemon
1 lonely bright pink Coneflower (where did that come from ?) called ‘Magnus’
A couple of dozen stems of Sedum that I salvaged from the previous garden in the hopes that new plants would form
4 white Phlox - dwarf
3 bright purple Phlox- dwarf
7 new Sedum 
I gorgeous Japanese Anemone -Anemone x hybrida ‘September charm’
1 Claudie Hydrangea
1 Lace Cap Hydrangea
2 Astilbe


When I dug each  hole, I put a huge handful of 3-Way Mix which contains peat humus, peat fibre and manure from Pefferlaw Peat (www.pefferlaw.com). Because of the contest I mentioned in a recent post,  I did some research about this company - it is in my zone, and I like the description of their products - so I decided to give it a try. I will know next season if it is all I think it will be. 

Besides, having it all in one bag works for me…..It is dark and rich and just for good  measure, I added a pinch or two of bone meal. 

 (Be careful not to breath the powder in…. Not good for our lungs, being that is ground up bone. Same with blood  meal- perhaps the granules would be better and not as airborne).

I usually fill the hole with water when I plant, but we had so much rain, both the plants and the earth were quite wet so I didn’t.  I did talk to each plant, though and assured them this would be the last time I would move them.  Oh dear, I may have lied about that.  I firmly believe if plants don’t do well in one spot, it is better to move them where they will do better.  But that is not the same as hauling them halfway across the city or even around the block, or is it?


Here's how it looked that fall:


....... and the following summer- its first:


Speaking of successes and failures, I completely forgot that a month before I was getting read to move my garden,  I entered photos of my first garden in a ‘before and after’ photo contest with a company called “Pefferlaw Peat Products (www.pefferlaw.com)

… Guess what?  I won !


The garden "Before".


The garden "After" (3 years later) 


You may see a theme starting with this garden and the new one......but there were two others between this one and the newest one.  A story for another time.


I love that feeling of diversity in a garden and perhaps because I had a Japanese Maple in my last garden, I really wanted one in this one.  Did my research and found they will tolerate a Black Walnut.

So, that first summer, I found two lovely ones - “Acer Emperor”- at the bargain price of $49 each - they are usually over a hundred dollars each.  They stood
about 6 feet tall, with dark red leaves and green undersides. I chose two that seemed to bend gracefully toward each other and the boys helped plant them - one on either side of the ‘pathway’ to the Love Rock.


I decided to put a large ‘Endless Summer’ Hydrangea on each side of the Love Rock and then a ‘Claudie’ which is a bit smaller and more spreading, with the ‘Nikko Blue” still smaller but bushy too - so the garden would be full of lush green foliage with lovely blue flowers.


All this gardening and no roses. The black walnut and roses do not get along.  However, I was determined and read that as long as plants that are sensitive are not either under the drip-line of the branches, nor near enough that the roots could touch, they should be fine.


Before we get to the new rose bed, here is this garden the following summer.


But alas, not long after this was taken, my beautiful Endless Summer Hydrangeas started looking pale.  The leaves became a paler- almost yellow green and I discovered that I had not researched the sensitivities of the Black Walnut and its victims well enough.  I did learn, that although there is a lot of information on the internet, I need to read all of it.... or at least enough that my initial findings are legitimate.

There are many things that make gardens grow, or not grow.  Sometimes we try to grow things that will not do well under our particular circumstances and in this case, Hydrangeas do not like, nor will they tolerate the juglone of the Black Walnut.

I hastily  moved all the Hydrangeas up to the side of the house...  far away from the tree they suffered under.... and as of now, they are much happier and back to their crisp deep green leaves, but it took that summer and the next - and lots of compost and love to make them stop pouting.

Good lesson here...research, ask, research, read, research, ask and research again. Most of the university websites, or those attached to botanical gardens will have more documented research than some personal ones, but the personal ones,  have stories by real gardeners who may have time to baby one plant over the hundreds of those in test gardens.  So read them all, and make your decisions based on the accumulated info you read.

And keep good notes if you are trying something new.  You may be able to teach someone else what you have learned.  Share your stories; successes and failures.


Thursday, 17 October 2013


Here is the back before we dug the new foundation for the addition.


(yes, I know  this is about moving my roses, but you need to see how their placement came about and how I had to learn to put the pieces of the puzzle together... light, soil, area etc... so bear with me through this rather long tale...)


The addition has begun, the river rock bed has “Big O” under and slopes toward the back corner of the garden where a deep rock well was dug to keep any water run-off from draining into neighbouring gardens.


I think this river-rock bed is a clever and attractive way to hide a drainage pipe. I cannot take credit for it, but I love how it looks and how it serves a good purpose too.


The large stone at the end of the ‘bed’ is on top of a 4 foot deep hole filled with gravel and stone.  

One day, we will put a water feature of some sort here, so in order to do that, we needed to move that stone. Once the gardens are in, we will not want the digger crawling down through them to move it...imagine it smashing roses, and tomatoes and sweet little peas !  Ack !  So it has to be moved soon.  We’ll just have him move it to one side, plant something lovely down there, with a statue or other feature.  But that remains for another creative day.


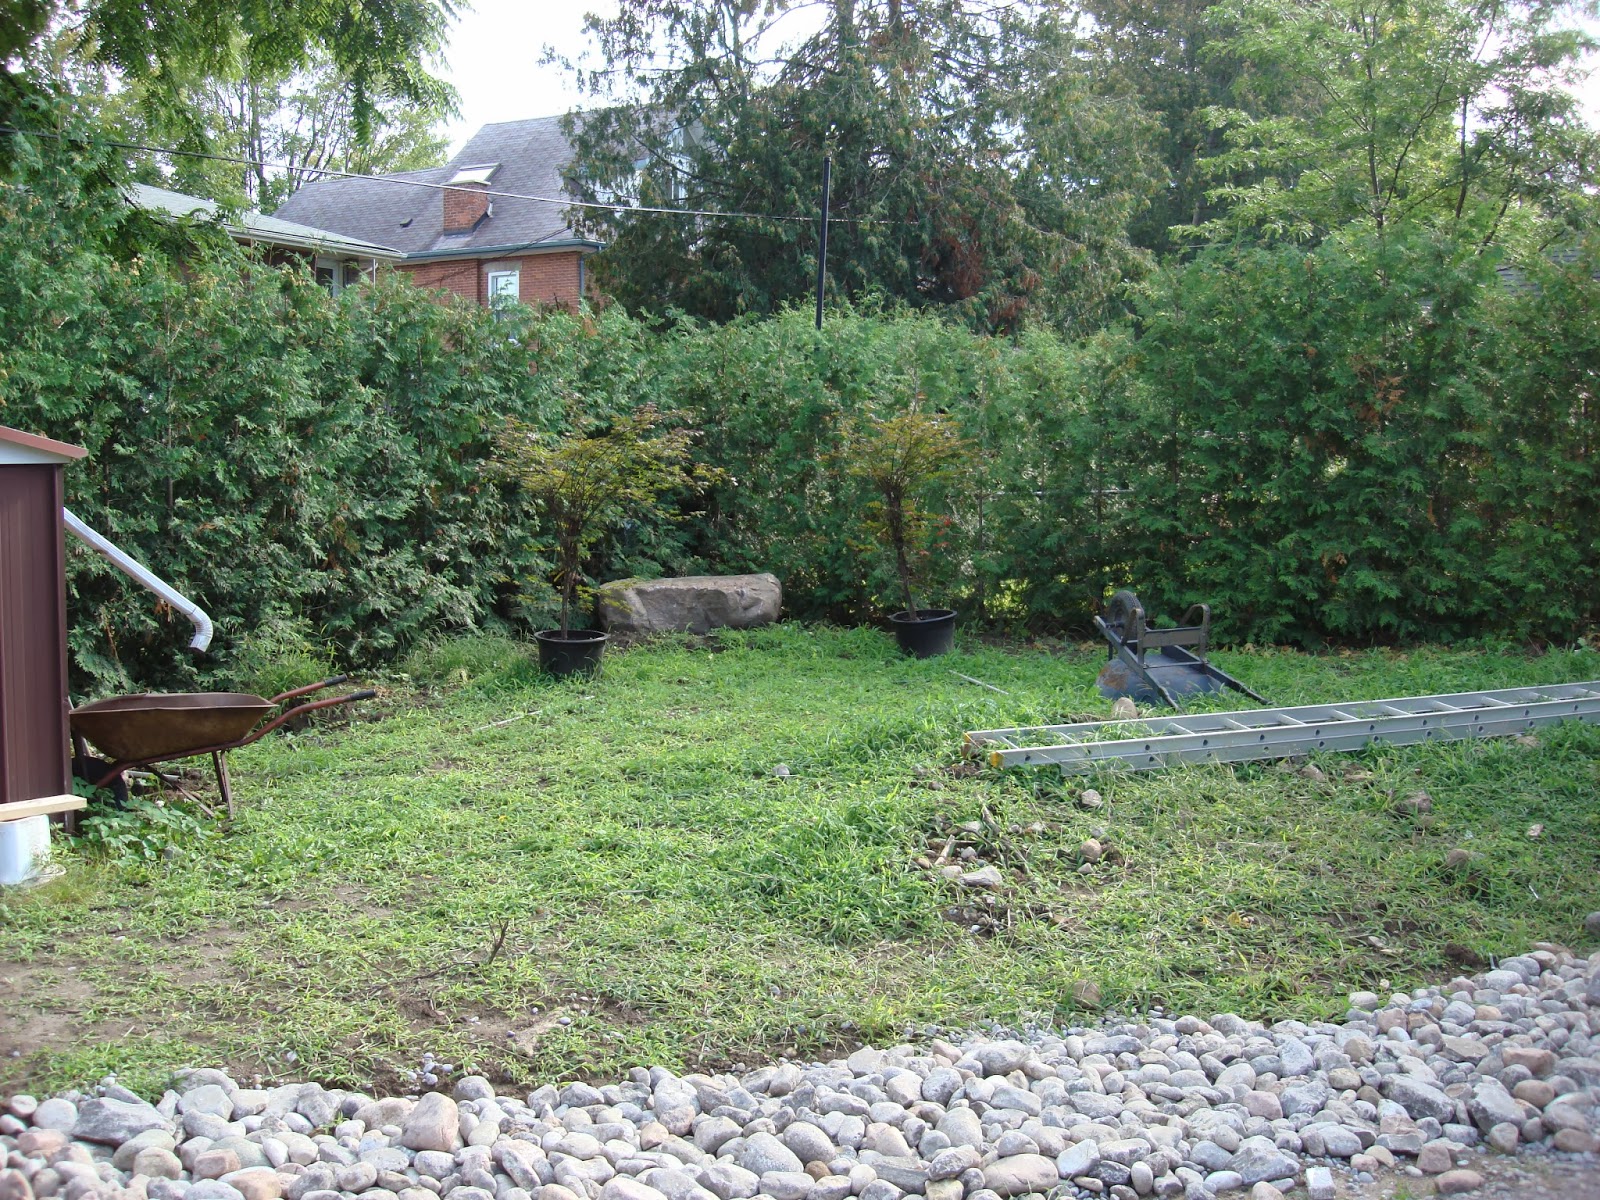
This is the way the south-west corner looked before the work began in the  Spring.  The cedar hedge is ours with a very large  Black Walnut in the background - in the neighbour’s garden.  I have researched what will grow under it and the list is quite extensive but for my purposes, all I have to plant will be happy.


This is the same corner, during the rock placing act.  That big rock in the corner, actually came out of the hole from the foundation.  The top split off and so the boys thought it would be a great sitting rock - they dubbed it the ‘Love Rock’.
I plan to put Hydrangeas on either side with Astilbes in front of them.  I have 3 large “Endless Summer” that I fed Aluminum Sulphate to keep them blue; one called “Claudie”, one “Lace Cap” and a “Nikko Blue”.  
As for Astilbes?  I brought at least 20 in shades that vary from white to  mauve and pink. Some are a few years old and some, I started from bare roots this past Spring.  In fact, I bought them in May, got busy and forgot them until the end of June. They were pretty dried out, but I doused them with water and two days later plunked them into the soil.  Guess what? Of the 18 in the bag (a real deal)  15 survived.  Except for the 2 the bratty squirrel dug up.   Yuk.

But on to more about gardens.


Sunday, 13 October 2013

Now back to the garden... the one in the back....


 Looking southeast, this is how it looked in the early Spring of that first year before any renovations to the house.


The digging began.  This mound of earth came from the dug
foundation at the back of the house to the right of this photo.


This is how it looked after the boys played with the rocks one day when I was away for a few hours.  This mid section will make a nice vegetable garden as it will be closest to the kitchen door and gets lots of sun.

The deck will be at the bottom right of this photo, just off the kitchen.  Some of these rocks came from the hole they dug for the foundation; some of them came from the digger-man’s quarry.  I will never forget the laughing and joking among the ‘boys‘  while playing with and moving the rocks, one by one.

They had way too much fun.


We bought blueberry bushes and two apple trees for the garden.  The apples are Honey Crisp (our favourite) and its pollinator, Royal Gala.  They would be planted at the end of the veggie bed ; one on either side of the ‘river bed’.

There is room in the small space above the Veggie bed for lilies - I think.  I wanted a hedge of roses, but it seems the snow will be plowed or pushed back off the drive onto this bed.  Will the roses survive? Years ago, a city nursery had its greenhouses on a busy street and a rose hedge  in front.  They took all the salt and winter debris with a toughness that defies logic.  So, maybe it might work for me.


I did  buy 4 small roses called “OSO easy” -Peachy Cream-- hardy to zone 3 - so maybe I shall give it a shot.  Poor things were on sale for $4 each, crying for me to take them home. Orphans, they were… the end of the season.


… now where should they go?